
4.3 Entering Data |

|

|

|

|
||
|
4.3 Entering Data |
|
|
|

|

|
4.3 Entering Data
|
4.3 Entering Data |
|
|
|
|
||
|
4.3 Entering Data |
|
|
|
|
|
Data can be entered into AUSRIVAS either by importing it from another location or entering it directly.
4.3.1 Importing data from another application
Invertebrate and habitat data files that are to be imported must be delimited text files. Any text delimiter can be used, but the most common are:
•Comma delimited (CSV files);
•Space and/or tab delimited.
Importing invertebrate data
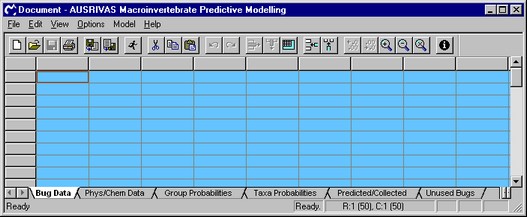
AUSRIVAS will open on the 'bug data' sheet.
To import your invertebrate data file open the 'File' menu and select 'Import' or click on the import button on the toolbar ![]() . A box listing possible file formats and attributes will appear. Note that your data file must contain the site codes and taxa codes. If the first data item in each of the rows in your file is the site code, select the 'with Row Headers' option, and the site codes will be used row headings in AUSRIVAS. The same applied to column headings. If the first row in your data file contains taxon codes, select the 'with Column Headings' options and the taxon codes will be imported into your AUSRIVAS spreadsheet.
. A box listing possible file formats and attributes will appear. Note that your data file must contain the site codes and taxa codes. If the first data item in each of the rows in your file is the site code, select the 'with Row Headers' option, and the site codes will be used row headings in AUSRIVAS. The same applied to column headings. If the first row in your data file contains taxon codes, select the 'with Column Headings' options and the taxon codes will be imported into your AUSRIVAS spreadsheet.
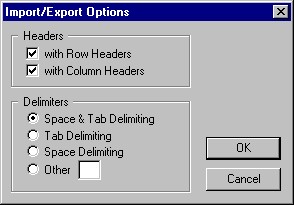
Now you need to let AUSRIVAS know about the format of your file. As discussed above, your file must be in a text delimited format, so you just need to specify the delimiter used in your file. In the diagram above, the delimiter is specified as "Space & Tab Delimiting". This means that the gaps between each data item in a row of data are made up of spaces and/or tabs. You can separate your data with other delimiters if you wish. The diagram below shows how to specify that your data is a CSV file (separated with commas). Note that the option 'Other' has been selected for delimiter type, and the delimiter itself (a comma) has been entered into the text box beside the 'Other' option.
When you have specified the type of delimiter in the text file you wish to import, click 'OK'. A directory box will open allowing you to browse and select the file to be imported.
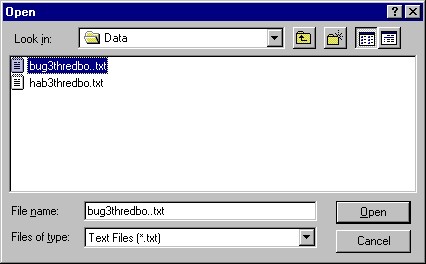
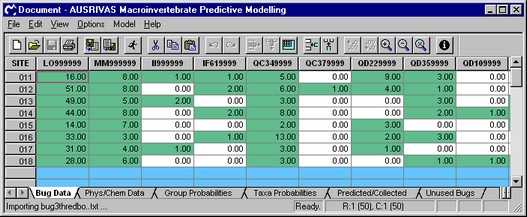
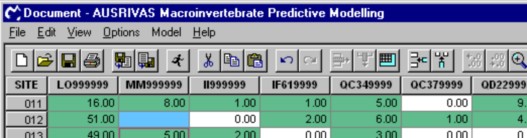
When you have selected your file, click 'Open', and your data will appear on the invertebrate sheet with taxa listed across the top and site codes listed down the side.
Importing Phys/Chem data
To import the file containing your physical and chemical data (predictor variables), click on the tab labelled 'Phys/Chem Data' sheet to make this sheet active.
The procedure is now the same as used for the invertebrate data (but with predictor variable codes rather than taxa codes).
Once the data is entered, both spreadsheets should be trimmed to ensure no blank rows or columns, using the 'delete blank rows and columns' icon ![]() .
.
Hint The 'trimming' procedure will also indicate any extraneous data in rows and columns, which will require deletion. |
4.3.2 Entering data directly into AUSRIVAS
To enter the invertebrate codes and site codes into the 'bug data' sheet, double click on the desired header box. A cursor will appear allowing the headers to be entered. To enter the data simply click on the desired cell. If at a later date you wish to modify an entry, a single click will allow replacing an entry while a double click will allow the entry to be modified. Once the invertebrate data has been entered click on the tab at the bottom of the screen for the phys/chem sheet. A blank sheet will open to enter the physical and chemical variables that are required to run the model. Again, once the data is entered, both spreadsheets should be trimmed to ensure no blank rows or columns, using the 'delete blank rows and columns' icon ![]() .
.
Hint Before proceeding to run the AUSRIVAS model you should save the AUSRIVAS file with your input data. If errors are encountered from this point on you can easily re-open the saved file and correct any errors, which may save you the time of importing the data again. |
4.3.3 Checking your input data for errors
Invertebrate data
It is important that there are no blank cells, as a site assessment cannot be produced for sites with blank cells in the invertebrate data. AUSRIVAS will highlight any cells with blank data as shown below. This screen shot shows how a blank cell is highlighted in blue.
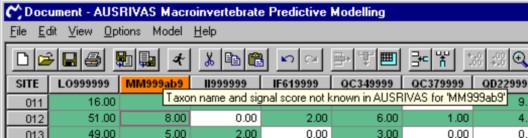
AUSRIVAS will also warn you when it does not recognise a taxon code. The causes of this will be either:
•The taxon code is incorrect. In this case check the list of valid invertebrate codes. (NOTE: TAXA CODES AND HABITAT VARIABLE NAMES ARE CASE SENSITIVE).
•The taxon is not known to AUSRIVAS. It is not necessary to delete the column if the taxon code is correct but simply not known to AUSRIVAS. Instead you are advised to retain the column and AUSRIVAS will move it to the 'Unused Bugs' sheet when running the model.
The diagram below shows the warning message and orange colouring given when a taxon has an incorrect code and/or the models do not cover that taxon.
Predictor variables
As for the invertebrate data, it is important that there are no blank cells, as a site assessment cannot be produced for sites with blank cells in the predictor variable data.
If AUSRIVAS does not recognise a variable code, it will highlight the variable code as an error. Note that this is different from the Invertebrate data, where only a warning is given and the model can still be run, as if AUSRIVAS does not recognise a predictor-variable code it cannot run the model.
AUSRIVAS may not recognise your predictor-variable code if you have spelled the code incorrectly, or if the variable itself is not known to AUSRIVAS.
The screen shot below shows the error message and red colouring given when a predictor variable has an incorrect code or is not known by AUSRIVAS. In this case, the variable "LATITUDE" has been incorrectly called "LAT". (Also shown is the blue highlighting of blank cells).
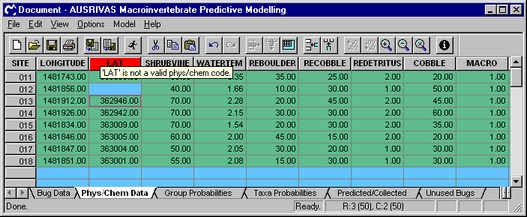
If you have an unknown Predictor variable code in your data, it must be removed or rectified before running a model.
4.3.4 Removing/editing data
If you want to change your data because of an error or warning, you can do so by either:
•Editing and re-importing the original data file, or
•entering the correct values directly into the invertebrate sheet.
Deleting a data column
To delete a data column, click in the header box of that column and the column will be highlighted. Next click on the edit menu and select remove column and the selected column will be deleted.
Care should be taken when removing taxa that those taxa that are required by the model are not deleted. If you do omit taxa that are required by the model, a dialog box that appears after running a model will identify any missing taxa and habitat variables.
