
4.7 Working with dialogs |

|

|

|

|
||
|
4.7 Working with dialogs |
|
|
|

|

|
4.7 Working with dialogs
|
4.7 Working with dialogs |
|
|
|
|
||
|
4.7 Working with dialogs |
|
|
|
|
|
When you select the menu items to view the:
•required model variables, or
•model bandwidths
you will firstly be presented with the 'Model Select' dialog in order to choose the model you want information on, as shown here.
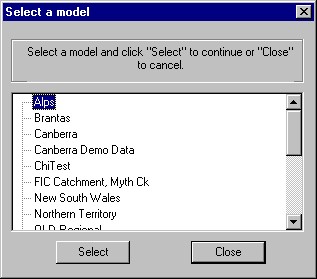
Follow the steps below to select a model.
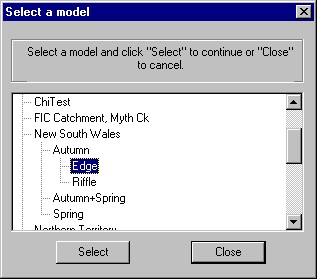
1. Double click on the region for the model you are interested in. This will open up a list of seasons for that model
2. Double-click on the season you want. A list of habitats will now be visible.
3. Finish the selection of your model by either double-clicking on the habitat, or selecting the habitat with a single mouse click, and hitting the 'Select' button.
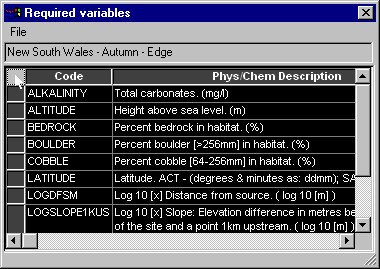
4.7.2 Required variables dialog
The 'Required variables' dialog can be opened from the 'Model'/'Required variables ...' menu. When you have selected the model you are interested in (see Select model dialog above), the 'Required variables' dialog will open for the model you have chosen. This dialog lists the
•Model name;
•Variable codes for that models required variables;
•Description of the variables.
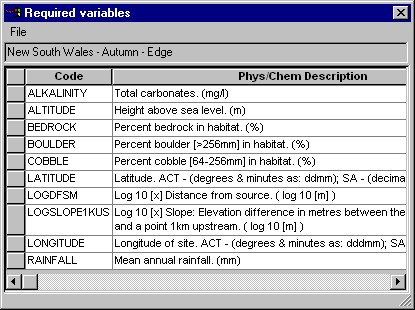
Viewing data
The 'Required variables' dialog is scrollable and resizable, so you can either scroll to view items that do not fit in the dialog, or you can make the dialog bigger.
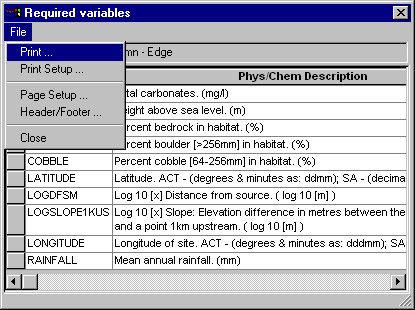
Printing
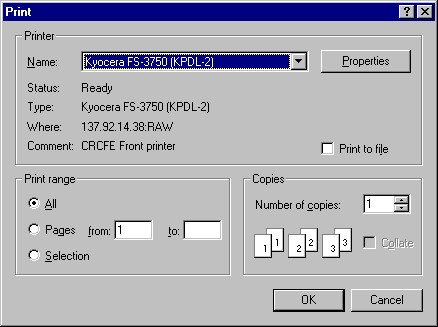
You can print data shown in the 'Required variables' dialog. Select 'Print' from the 'File' menu:
A standard format 'Print' dialog will open, as shown below, which allows you to select your printer, set printer properties, and print to either a printer or to file.
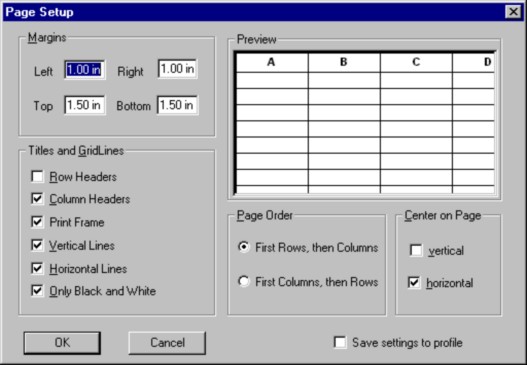
Page setup
You can control various aspects of how the required variables data is printed to the page using the 'Page Setup' dialog (pictured below). You will usually want to print column headings, but omit row headings (as these are blank in the dialog) and may want to set margins and chose whether to draw grid-lines or not.
Hint To save your 'Page setup' settings, so that they are used by default whenever you run AUSRIVAS, tick the 'Save settings to profile' box. |
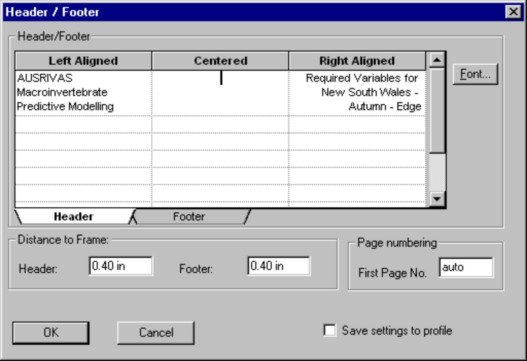
Header and Footer setup
You can also control the information that is displayed in the header and footer of your output, by using the 'Header / footer' dialog, available from the 'File' menu (pictured below).
The AUSRIVAS program will provide you with a default header and footer, so you only need to change settings if you want to alter the default. The settings that AUSRIVAS provides in the header are program name and model name, as shown in the dialog pictured below. The footer contains the date and the page number in the 'Page n of N' format.
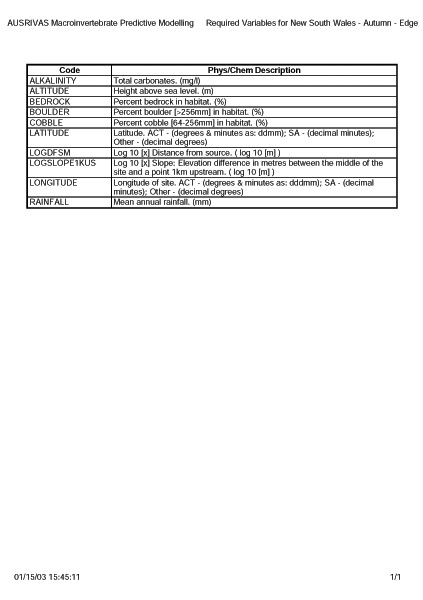
A sample printed output from the 'Required Variables' dialog is shown below.
Saving/exporting
You cannot save the information in the 'Required Variables' dialog directly from the dialog. You can however copy and paste the data into another application, such as a spreadsheet, where it can then be saved or exported into another format.
Hint To select all the cells in the dialog, click on the top left-hand cell as shown in the diagram below. |
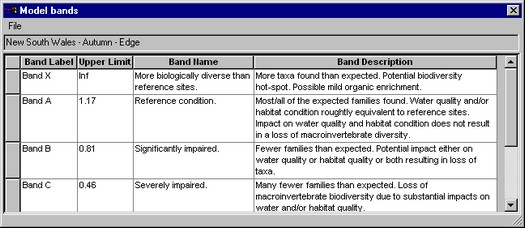
4.7.3 Model bands dialog
The 'Model Bands' dialog can be opened from the 'Model'/'Bandwidth ...' menu. When you have selected the model you are interested in (see Select Model dialog above), the 'Model bands' dialog will open for the model you have chosen. This dialog lists the
•Model name;
•Band label;
•Band upper limit;
•Band name;
•Band description.
Viewing data
The 'Model Bands' dialog is scrollable and resizable, so you can either scroll to view items that do not fit in the dialog, or you can make the dialog bigger.
Printing
You can print data shown in the 'Model Bands' dialog, using the same method for the 'Required Variables' dialog, described above.
A sample printed output from the 'Model Bands' dialog is shown below.
Saving/exporting
The method used for saving and exporting is the same as for the 'Required variables' dialog, described above.
